If your front Steps are leaning, cracked, or have developed that annoying wobble, you’re not alone. Winter in Ogden can be brutal on concrete — freeze-thaw cycles, poorly compacted backfill, and heavy snowmelt all conspire to make steps settle. This guide is for homeowners who want a sensible, safe approach to lifting concrete steps themselves — or at least know enough to speak intelligently with a contractor. I’m writing this as someone who’s watched too many DIY videos and also been called in to clean up rushed jobs. You know what? You can do a lot yourself, but there are real limits. Let me explain.
Why your steps are sinking (and why you should care)
Concrete doesn’t just sink for fun. Usually the ground beneath it shifts. In Ogden, soils vary — clay patches hold water, sandy spots wash away, and freeze-thaw heaves things apart. Add poor compaction when the steps were poured, clogged gutters dumping water at the base, or tree roots nudging things sideways, and you’ve got a recipe for trouble.
When steps settle unevenly you get cracks, loose treads, and tripping hazards. That’s not just ugly; it’s risky. A small shift today can become a big, expensive problem next season. Honest question: do you want to patch cosmetically or fix the cause? That answer will steer your next step.
Is this a DIY project — or a job for Mud Dog Jacking?
Here’s the thing: some jobs are perfectly fine for a weekend warrior. Small, slightly sunk steps usually can be corrected with jacks, cribbing, and a careful approach. But if the steps are heavily cracked, leaning badly, or attached to a porch foundation — or if utilities run under them — call a pro.
It’s a mild contradiction: you can do this yourself, but sometimes you shouldn’t. Why? Because lifting concrete incorrectly can cause more cracking, void warranties, or destabilize nearby structures. If you’re comfortable with a floor jack, working with timber shims, and following safety protocols, go ahead. If you’re not, give us a call.
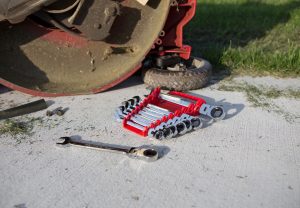
Tools and materials you’ll actually need
Below are the essentials — and a few nice-to-haves. Don’t skip safety gear; falling concrete will ruin your day.
- Hydraulic bottle jack or floor jack — 10-ton capacity is common for steps; Harbor Freight, Torin, or Pittsburgh are typical brands.
- Steel or screw jacks — for fine adjustments and holding the lift in place.
- Pressure-treated cribbing — 4×4 or 6×6 blocks to support the step while you work.
- Concrete mix or non-shrink grout — to fill gaps after lifting.
- Polyurethane foam injection kit (optional) — for smaller voids, less mess; available from concrete suppliers.
- Safety gear — gloves, safety glasses, steel-toe boots, dust mask.
- Tools — pry bar, sledge, drill, chisels, wheelbarrow, shovel, level, tape measure.
Here’s a quick cost/time chart to help you decide:
| Method | Typical Cost (materials) | DIY Skill |
|---|---|---|
| Mechanical jacking & cribbing | $50–$300 | Moderate |
| Polyurethane foam injection | $150–$600 (kit) | Moderate |
| Mudjacking (grout) | $300–$1,000+ | Low (but heavy equipment) |
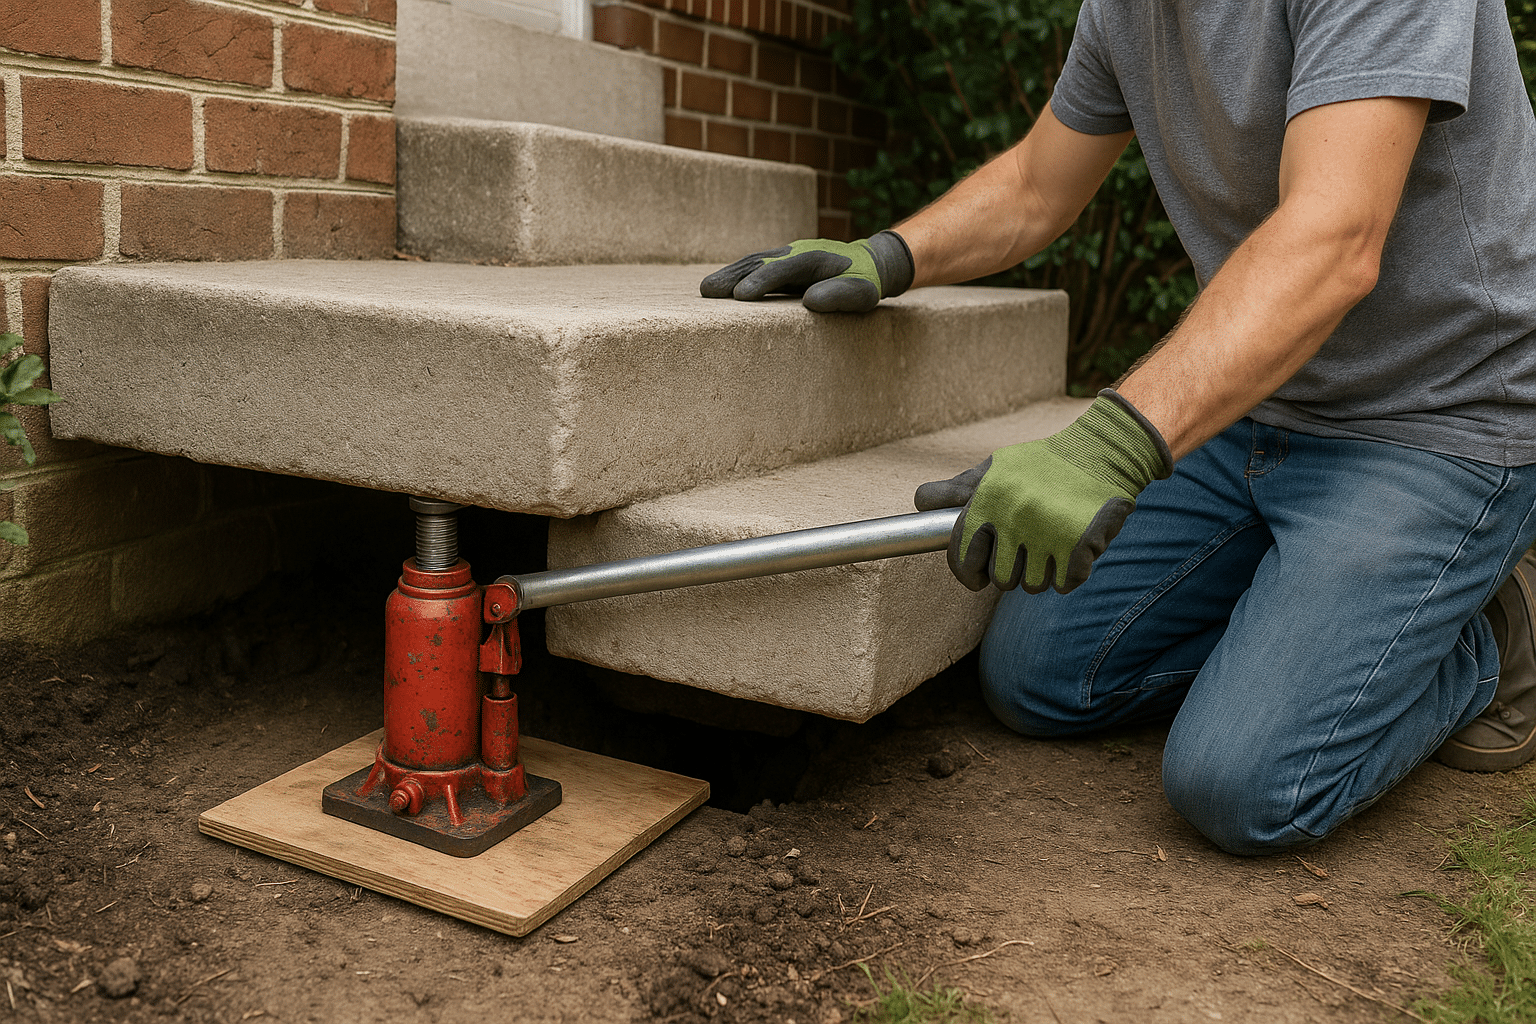
Step-by-step: Lifting with jacks and cribbing — the classic DIY
This method is straightforward and uses common hardware-store gear. It’s ideal for isolated step units that aren’t part of a structural porch.
Prep: Clear the area. Remove loose mortar and debris. Check for cracks that run through to underlying footings. Snap photos — they help later if you call a pro.
1. Measure and mark. Use a level and tape measure. Find how much the step needs to come up. Small adjustments — under 1 inch — are typical.
2. Create relief. If the step is sitting tight, you may need to slightly chip the underside to allow movement. Don’t overdo it; you’re not demolishing the slab.
3. Position the jack. Place the bottle jack under a central bearing point — usually the step tread or riser where concrete is solid. Put a steel plate or thick timber block between jack and concrete to protect the slab.
4. Start slow and steady. Pump the jack in small increments. Lift a half-inch, then stop. Insert timber cribbing as you go, stacking snugly to take the load. Repeat until you reach the desired level.
5. Don’t over-lift. Lifting past original level can cause new stresses. If you lift a tiny bit high, let it settle down slowly.
6. Secure with grout. Once level, you’ll have voids beneath the step. Mix non-shrink grout or use a concrete patch to fill gaps. For larger voids, pour a small concrete foot with rebar or use a grout pump.
7. Finish and cure. Smooth the patch, keep it moist for proper curing, and avoid heavy use for at least 24–48 hours depending on mix.
Safety notes: never rely just on the jack. Always crib up the slab with solid blocks. Use two jacks for long runs to keep the lift even. If anything creaks or shifts unexpectedly, stop.
Using polyurethane foam — less mess, more precision
Polyurethane foam injection is popular because it weighs less than grout, lifts precisely, and hardens quickly. Interstate contractors and homeowners use systems where small holes (about 3/4 inch) are drilled into the slab, and high-density foam is pumped in. The expanding foam fills voids and raises the concrete.
Pros: Fast, clean, minimal disruption. Good for narrow steps or tight yards where heavy equipment won’t fit.
Cons: Kits can be pricey. Once injected, the foam is permanent and not reusable. Also, if the underlying soil is still eroding, foam will stabilize the slab but won’t always address poor drainage.
If you try this yourself, buy a quality kit or rent a pump from a local concrete supplier. Follow the manufacturer’s instructions on hole placement and volume. Worse-than-usual result? It’s usually because too much foam was injected too fast. Slow and steady wins here, too.
Finishing touches: repairs that keep things from sinking again
Lifting the step is half the job. The other half is preventing recurrence.
Fix drainage first. Extend downspouts away from the steps, regrade the soil to slope away, and consider French drains if your yard collects water.
Compact backfill properly. If you open up the area and add soil, compact it in layers with a hand tamper or rented plate compactor. Loose fill is the same problem all over again.
Repair cracks cleanly. For hairline cracks use a polymer-modified cement or specialized crack filler. For larger breaks, chip out and use cement patch, smoothing with a pointing trowel.
Consider frost protection. In Ogden, a thin insulation layer under steps can reduce freeze-thaw movement — not a bad idea for exposed, northerly steps.
Common mistakes — and how to dodge them
Mistakes happen. Here are the ones you’ll see most often — and how to avoid them.
Lifting too fast. Pump the jack slowly. Rapid lifts stress concrete.
Not supporting the load. A jack is temporary. Use solid cribbing immediately.
Fixing symptoms, not the cause. Never ignore poor drainage or unstable soil. You’ll be back next year if you do.
Overconfidence with utilities. You might think there’s nothing under the slab, but electrical conduit or gas lines can creep in. Call 811 before digging.
What if the steps keep sinking after a repair? That usually means the underlying soil is failing deeper down. At that point you need a deeper solution — underpinning, replacement, or professional slabjacking.
When it’s time to call Mud Dog Jacking
Maybe you’ve tried a small fix and it held for a while. Or maybe the steps are worse and you want a one-and-done solution. We handle everything from targeted lifting to full restorations, and we know local conditions in Ogden — soil quirks, seasonal freeze patterns, and neighborhood drainage issues.
We bring tools and training you likely don’t: hydraulic rigs, foam pumps, certified safety practices, and warranties. And yes, sometimes it’s cheaper to have us do it right the first time than to keep patching.
Want a fast answer? Call us at 801-644-9122 or click to Request a Free Quote. We’ll assess whether a DIY approach makes sense or if a professional lift will save you money and headaches.
If you’re the hands-on type, remember: start small, measure twice, lift slowly, and crib like your life depends on it. And if you’d rather hand it off, we’re ready — local, experienced, and practical: that’s Mud Dog Jacking in Ogden.